

Play Store Application link – Spring Framework in 9 steps – Apps on Google Play
Ways to setup Spring in IDE-
Sure, here’s a more detailed comparison with URLs for each IDE:
| Aspect | Eclipse | IntelliJ IDEA | Spring Tool Suite (STS) |
|---|---|---|---|
| Adding Spring libraries | 1. Manually add JAR files to project’s classpath | 1. Manually add JAR files to project’s classpath | 1. Manually add JAR files to project’s classpath |
| Maven support (Preferred) | 1. Supported via plugins (e.g. m2eclipse) – https://www.eclipse.org/m2e/ | 1. Supported natively via Maven integration – https://www.jetbrains.com/help/idea/maven-support.html | 1. Supported natively via Maven integration – https://spring.io/tools/docs/4.7.0.RELEASE/all#maven-integration |
| Gradle support | 1. Supported via plugins (e.g. Buildship) – https://projects.eclipse.org/projects/tools.buildship | 1. Supported natively via Gradle integration – https://www.jetbrains.com/help/idea/gradle-support.html | 1. Supported natively via Gradle integration – https://spring.io/tools/docs/4.7.0.RELEASE/all#gradle-integration |
| Spring Boot support | 1. Supported via plugins (e.g. Spring Boot Tools) – https://spring.io/tools/sts/all | 1. Supported natively via Spring Boot integration – https://www.jetbrains.com/help/idea/spring-boot.html | 1. Supported natively via Spring Boot integration – https://spring.io/tools/docs/4.7.0.RELEASE/all#spring-boot |
| Spring Tool Suite | 1. Install Spring Tool Suite plugin for additional features – https://spring.io/tools/eclipse | N/A | 1. Comes with pre-configured templates and wizards for Spring – https://spring.io/tools/docs/4.7.0.RELEASE/all#sts |
As we can see, from above ways to setup spring framework, Maven is recommended and preferred.
So we will use Maven to setup spring in Eclipse here, similarly you can use any ways in any IDE.
Important –
- Archetype: The archetype specifies the type of project that you want to create. It defines the project structure and dependencies, making it easier to create new projects with the same structure and dependencies.
- ArtifactId: The artifactId is a unique identifier for the specific project that you are creating. It is used as part of the generated filename for the project’s JAR or WAR file.
- GroupId: The groupId is a unique identifier for a group of related projects. It is typically used to organize projects that are developed by the same team or company.
| Archetype | ArtifactId | GroupId | Description |
|---|---|---|---|
| maven-archetype-quickstart | my-app | com.example | A simple Java application that prints “Hello, World!” to the console |
| maven-archetype-webapp | my-webapp | com.example.web | A web application that uses the servlet API |
| spring-boot-starter-parent | my-spring-boot-app | com.example.spring | A Spring Boot application with a parent POM that includes default configuration for Spring Boot |
| maven-archetype-jar | my-jar | com.example.library | A Java library that can be used as a dependency in other projects |
-Setup Spring in Eclipse IDE-
1- Install Eclipse: If already not, you can download Eclipse from their official website: https://www.eclipse.org/downloads/
2- Check Maven installation – Click File->New
if Maven Project option is available then skip Step 3.

3-( If Maven Project is not available ) Install Maven Integration for Eclipse plugin: Open Eclipse and navigate to Help > Eclipse Marketplace. Search for “Maven Integration for Eclipse” and click Install. Follow the installation instructions and restart Eclipse.
Then go as above image – File-> New ->Maven Project
4- Create a new Maven project: Navigate to File > New > Other. Select “Maven Project” from the list and click “Next”.
Select “Create a simple project (Skip archetype selection)” , click this checkbox.
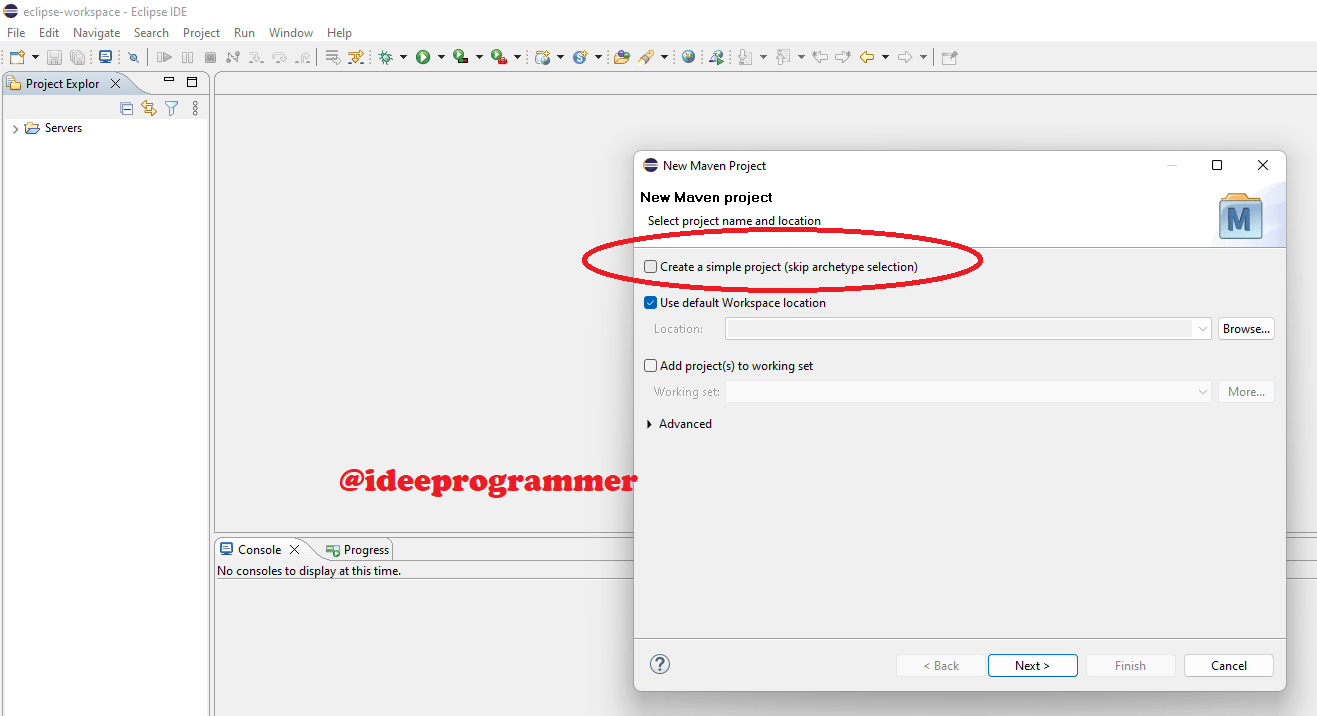
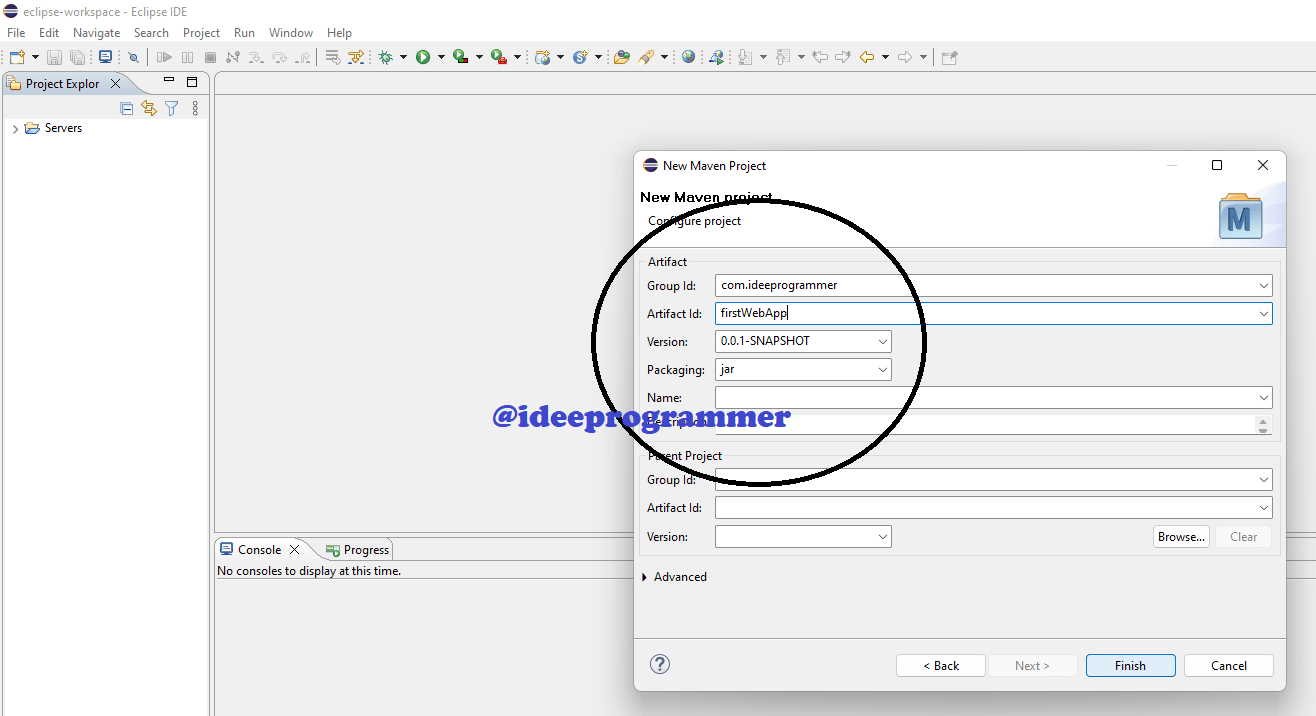
and click “Next”. Enter your Group Id and Artifact Id, and click “Finish”.
5- Add Spring dependencies: Open the pom.xml file in the project and add the following dependencies for Spring:
<dependencies>
  <dependency>
    <groupId>org.springframework</groupId>
    <artifactId>spring-context</artifactId>
    <version>5.3.4</version>
  </dependency>
  <dependency>
    <groupId>org.springframework</groupId>
    <artifactId>spring-web</artifactId>
    <version>5.3.4</version>
  </dependency>
</dependencies>
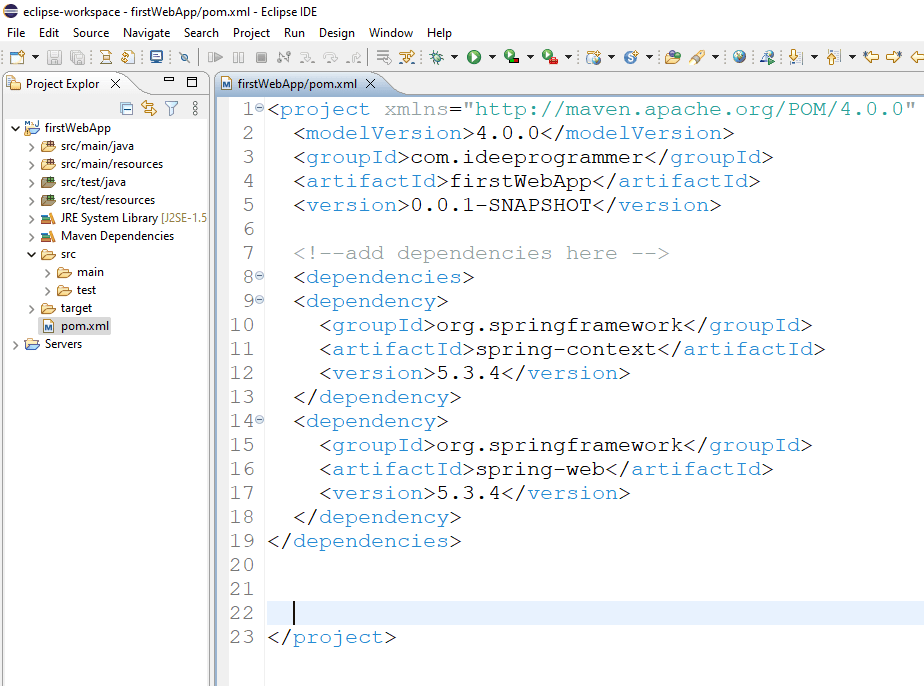
Note: The above example includes Spring Context and Spring Web dependencies, but you can add other Spring dependencies as needed.
6- Refresh Maven project: Right-click on the project in Eclipse and select Maven > Update Project. Check “Force Update of Snapshots/Releases” and click OK.
-First Hello World Program-
There are 2 ways to write code in Spring framework,
Method 1- Using XML (Original and old way)–
1-Create a Spring Configuration file: Create a new XML file under src/main/resources and name it “applicationContext.xml“. Define your beans in this file using the appropriate Spring syntax. Here’s an example:
<beans xmlns="http://www.springframework.org/schema/beans"
       xmlns:xsi="http://www.w3.org/2001/XMLSchema-instance"
       xsi:schemaLocation="http://www.springframework.org/schema/beans
                           http://www.springframework.org/schema/beans/spring-beans-3.0.xsd">

  <bean id="helloWorldBean" class="helloWorldSpringXml.HelloWorld">
    <property name="message" value="Hello, World!"/>
  </bean>

</beans>
In this example, we’re defining a bean with an id of “helloWorldBean” and a class of “com.ideeprogrammer.HelloWorld”. We’re also setting a property called “message” to the value “Hello, World!”.
2- create a class, HelloWorld.java
package helloWorldSpringXml;
public class HelloWorld {

    String message;

    public String getMessage() {
        return message;
    }

    public void setMessage(String message) {
        this.message = message;
    }
}
3- Create a Main class: Create a new Java class with a main method. In the main method, create an instance of the Spring ApplicationContext using the following code:
package helloWorldSpringXml;
import org.springframework.context.ApplicationContext;
import org.springframework.context.support.ClassPathXmlApplicationContext;

public class Main {

  public static void main(String[] args) {
    ApplicationContext context = new ClassPathXmlApplicationContext("applicationContext.xml");

    HelloWorld helloWorld = (HelloWorld) context.getBean("helloWorldBean");
    System.out.println(helloWorld.getMessage());
  }

}
In this example, we’re creating an instance of the Spring ApplicationContext using the ClassPathXmlApplicationContext class and passing in the name of the Spring Configuration file we created earlier. We’re also getting an instance of the “helloWorldBean” bean using the getBean() method and casting it to our HelloWorld class. Finally, we’re calling the getMessage() method on the HelloWorld instance and printing the result to the console.
4- Run the application: Right-click on the Main class and select Run As > Java Application. You should see the output “Hello, World!” in the console.
Github Project Link – https://github.com/kuldeep101990/HelloWorldSpringXml
Method 2- Using Annotations (Modern and preferred way): —
1- HelloWorld.java
package com.ideeprogrammer;
import org.springframework.beans.factory.annotation.Value;
import org.springframework.stereotype.Component;
@Component
public class HelloWorld {
    @Value("Hello, World!")
    private String message;
    public String getMessage() {
        return message;
    }
}
2- Main.java
import org.springframework.context.ApplicationContext;
import org.springframework.context.annotation.AnnotationConfigApplicationContext;
public class Main {
  public static void main(String[] args) {
    ApplicationContext context = new AnnotationConfigApplicationContext("com.ideeprogrammer");
    HelloWorld helloWorld = (HelloWorld) context.getBean("helloWorld");
    System.out.println(helloWorld.getMessage());
  }
}
Github Project Link – https://github.com/kuldeep101990/HelloWorldSpringAnnotation
That’s it! You have successfully set up a Spring project in Eclipse using Maven with a code example.
Thanks for sharing. I read many of your blog posts, cool, your blog is very good.
whoah this blog is excellent i love reading your posts. Keep up the great work! You know, many people are looking around for this information, you can help them greatly.
Appreciating the persistence you put into your blog and detailed information you offer. It’s good to come across a blog every once in a while that isn’t the same out of date rehashed material. Excellent read! I’ve saved your site and I’m including your RSS feeds to my Google account.
It is in point of fact a nice and useful piece of information. I am glad that you shared this helpful information with us. Please keep us informed like this. Thanks for sharing.
Interesting blog! Is your theme custom made or did you download it from somewhere? A design like yours with a few simple adjustements would really make my blog stand out. Please let me know where you got your design. Thanks